

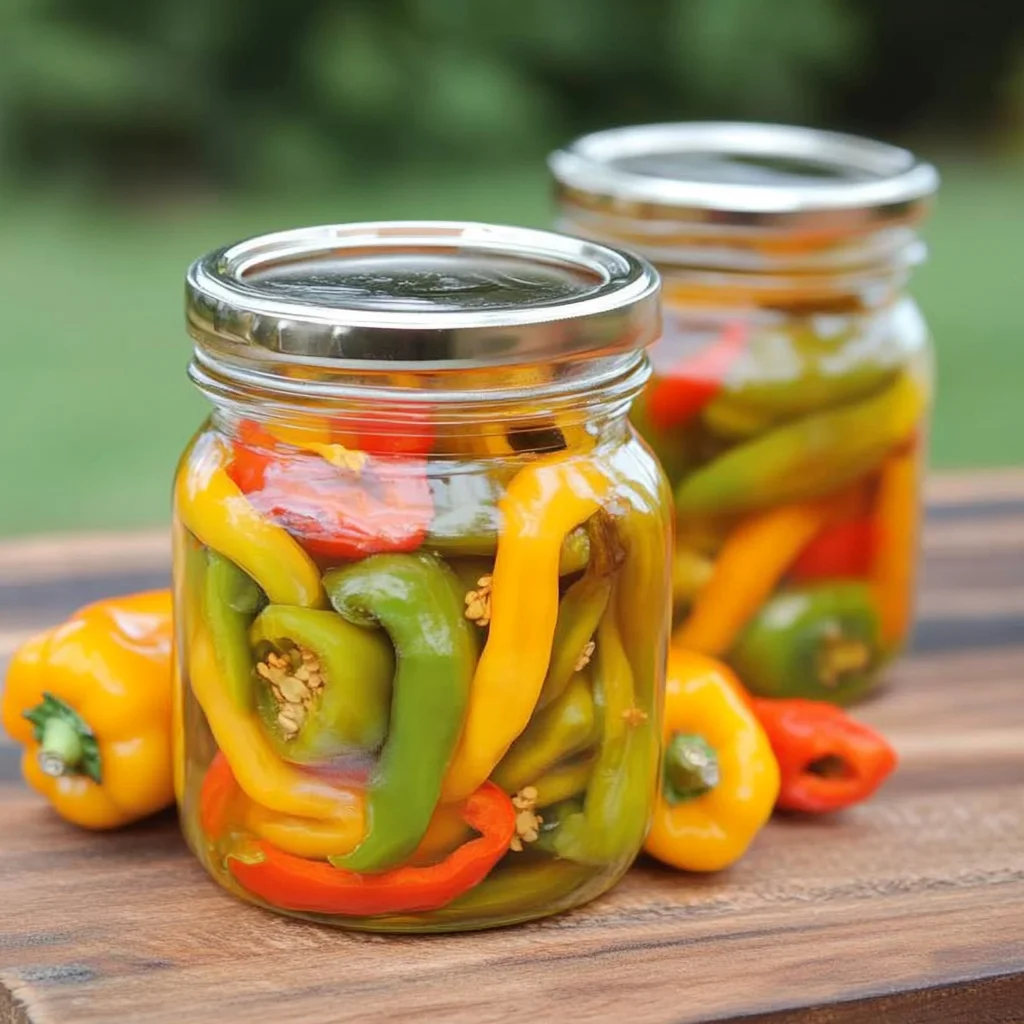
Pickled Sweet Peppers are a delightful addition to many dishes, bringing a sweet and tangy flavor that elevates sandwiches, steak subs, and salads. These vibrant peppers are not only easy to make but also perfect for various occasions, whether it’s a summer picnic or a cozy winter meal. With their colorful appearance and unique taste, they will surely impress your family and friends.
Why You’ll Love This Recipe
- Easy to Make: With just a few simple steps, you can have delicious pickled sweet peppers ready in no time.
- Versatile Flavor: These peppers can enhance many dishes, from burgers to salads, adding a burst of flavor.
- Long Shelf Life: Properly canned, these pickled peppers can last up to a year, making them perfect for meal prep.
- Customizable Heat: You can adjust the spice level by adding hot peppers if you like a little kick.
- Perfect for Gifting: Jars of pickled sweet peppers make great gifts for friends and family who enjoy cooking.
Tools and Preparation
Before starting your pickling adventure, gather the necessary tools and equipment. Having everything ready will streamline the process and ensure success.
Essential Tools and Equipment
- Canning pot
- Sterilized jars
- Wide-mouth funnel
- Ladle
- Tongs
Importance of Each Tool
- Canning pot: This is crucial for creating an even boil during processing and helps ensure your jars seal properly.
- Wide-mouth funnel: Using this makes pouring the hot brine into jars mess-free while preventing spills.
- Ladle: A ladle allows for easy transfer of brine without burning yourself.
Ingredients
Creating Pickled Sweet Peppers requires some basic ingredients that blend together to provide that characteristic tangy sweetness.
For the Brine
- 1 tablespoon pickling or kosher salt
- 6 cups cider vinegar
- 2 cups white vinegar
- 4 cups water
- 6 cups granulated sugar
- 8-10 cloves garlic (smashed)
- 1/2 tablespoon turmeric powder
- 1 tablespoon whole peppercorns
- 1 teaspoon mustard seed
- 1 teaspoon celery seed
For the Peppers
- 4 1/2 to 5 pounds red, green, and orange bell peppers (sliced 1/4-inch thick)
- 1 large onion (halved and sliced thinly)
For Garnish
- 2 tablespoons fresh parsley, finely chopped

How to Make Pickled Sweet Peppers
Step 1: Prepare the Brine
In a large pot, combine the following ingredients:
* 1 tablespoon pickling or kosher salt
* 6 cups cider vinegar
* 2 cups white vinegar
* 4 cups water
* 6 cups granulated sugar
* 8-10 cloves garlic (smashed)
* 1/2 tablespoon turmeric powder
* 1 tablespoon whole peppercorns
* 1 teaspoon mustard seed
* 1 teaspoon celery seed
Bring this mixture to a boil over medium to high heat.
Step 2: Sterilize Your Jars
In a separate canning pot, sterilize your jars. Ensure they are clean and hot before filling them with vegetables.
Step 3: Fill the Jars
Place the sliced peppers and onions into each jar. Press down gently to compact them. Fill each jar with brine using a wide-mouth funnel, leaving about 1/2-inch headspace. Remove any air bubbles by running a clean utensil around the inside edge of each jar.
Step 4: Seal the Jars
Wipe the rim of each jar with a clean paper towel. Center the lid on top and apply the band until it is fingertip tight.
Step 5: Process in Water Bath
Place the jars into a water bath canner. Process them for about 15 minutes while adjusting for altitude as needed.
Step 6: Cool and Store
After processing, carefully remove jars from the water bath using tongs. Allow them to cool completely on your counter for about 24 hours. For optimal flavor development, let them sit in a cool, dry place for at least three weeks before enjoying. Once opened, store any remaining jars in the refrigerator.
Your homemade Pickled Sweet Peppers are now ready! Enjoy this vibrant treat on your favorite dishes!
How to Serve Pickled Sweet Peppers
Pickled Sweet Peppers add a delightful tang and crunch to various dishes. They are versatile and can enhance your meals in many ways. Here are some creative serving suggestions to enjoy your pickled peppers.
On Sandwiches
- Classic Deli Style: Layer pickled sweet peppers on your favorite sandwich for an extra zing.
- Italian Sub: Combine with meats, cheeses, and fresh veggies for a vibrant Italian hoagie.
In Salads
- Garden Salad: Toss them into mixed greens for added flavor and color.
- Pasta Salad: Incorporate into cold pasta salads to provide a sweet contrast to savory elements.
With Grilled Meats
- Barbecue Chicken: Serve alongside grilled chicken for a refreshing sidekick.
- Steak Tacos: Use them as a topping for steak tacos, enhancing the dish’s flavors.
As Snack Platter
- Charcuterie Board: Include pickled sweet peppers with cured meats and cheeses for an impressive appetizer.
- Veggie Platter: Pair them with hummus or dips as a crunchy snack option.
How to Perfect Pickled Sweet Peppers
Achieving the best pickled sweet peppers requires attention to detail. Follow these tips for perfect results every time.
- Choose fresh peppers: Fresh, firm bell peppers yield the best texture and flavor in your pickling process.
- Use quality vinegar: Opt for high-quality cider and white vinegar for optimum taste in your brine.
- Adjust seasoning: Feel free to tweak spices according to your taste preferences, adding more or less garlic or peppercorns.
- Ensure proper sterilization: Sterilizing jars prevents spoilage, ensuring that your pickles remain safe and delicious.
- Monitor headspace: Leave adequate headspace in jars (1/2 inch) to allow the contents to expand during processing.
- Patience is key: For the best flavor profile, allow the pickles to sit for 3 to 4 weeks before tasting.
Best Side Dishes for Pickled Sweet Peppers
Pickled Sweet Peppers pair wonderfully with various side dishes. Here are some options that complement their unique flavor.
- Coleslaw: A creamy coleslaw balances the tanginess of the peppers beautifully.
- Cornbread: The sweetness of cornbread contrasts nicely with the acidity of pickled peppers.
- Potato Salad: Add diced pickled peppers to potato salad for a zesty twist on the classic recipe.
- Grilled Vegetables: Charred seasonal veggies enhance the sweetness of the peppers when served together.
- Rice Pilaf: Fluffy rice pilaf topped with pickled sweet peppers creates a delightful flavor combination.
- Baked Beans: The sweetness of baked beans pairs well with the tangy notes of pickled peppers.
Common Mistakes to Avoid
Making Pickled Sweet Peppers at home can be a fun and rewarding experience, but there are a few common mistakes that can ruin the process.
- Not sterilizing jars properly: Always sterilize your jars before filling them. This prevents contamination and helps preserve the peppers longer.
- Overfilling the jars: Be sure to leave enough headspace in each jar (1/2 inch). Overfilling can cause the brine to overflow during processing, leading to spoilage.
- Ignoring altitude adjustments: If you live at a high altitude, you may need to adjust your processing time. Always check altitude guidelines for safe canning.
- Using non-pickling salt: Regular table salt can contain additives that cloud the brine. Use pickling or kosher salt for the best results.
- Skipping the cooling period: Allowing your jars to cool completely on the counter is crucial for sealing. Avoid moving them too soon after processing.
Refrigerator Storage
- Pickled Sweet Peppers can last up to 1 year if stored in a cool, dry place.
- Once opened, keep them in an airtight container in the refrigerator for optimal freshness.
Freezing Pickled Sweet Peppers
- They are not recommended for freezing as this alters their texture and flavor.
- Instead, enjoy them fresh from the jar after proper storage.
Reheating Pickled Sweet Peppers
- Oven: Place in an oven-safe dish and heat at 350°F until warmed through.
- Microwave: Heat in short bursts (30 seconds), stirring between sessions until warm.
- Stovetop: Warm gently in a pan over low heat, stirring occasionally to avoid burning.
Frequently Asked Questions
Can I use other types of peppers for pickling?
Yes, you can experiment with different varieties such as jalapeños or banana peppers. Just keep in mind that taste and spice levels may vary.
How long should I wait before eating my Pickled Sweet Peppers?
For best flavor, allow them to sit for 3 to 4 weeks before enjoying. This lets the flavors meld beautifully.
Can I adjust the sweetness of my Pickled Sweet Peppers?
Certainly! You can reduce or increase the sugar amount based on your preference for sweetness.
What dishes pair well with Pickled Sweet Peppers?
These peppers add a delightful crunch and tanginess to sandwiches, salads, and tacos. They also complement grilled meats very well.
Final Thoughts
Pickled Sweet Peppers are not only easy to make but also incredibly versatile. Their sweet and tangy flavor enhances many dishes, making them a perfect addition to your kitchen staples. Feel free to customize your recipe by adding herbs or using different pepper varieties—get creative! Enjoy your homemade pickles throughout the year!
Pickled Sweet Peppers
Pickled Sweet Peppers are a burst of flavor, combining sweetness and tanginess that elevates any dish. Perfect for sandwiches, salads, or as a vibrant side, these colorful peppers are easy to make and ideal for both summer picnics and cozy winter meals. With the right balance of spices and a bit of patience, you can create a delightful homemade treat that not only impresses but also lasts for up to a year in your pantry. This recipe is customizable too, allowing you to adjust the heat by incorporating hot peppers if desired. Enjoy them fresh from the jar or as a unique gift for fellow food lovers.
- Prep Time: 30 minutes
- Cook Time: 15 minutes
- Total Time: 45 minutes
- Yield: Approximately 12 servings (1 tablespoon each) 1x
- Category: Condiment
- Method: Canning
- Cuisine: American
Ingredients
- 4 1/2 to 5 pounds bell peppers (red, green, orange)
- 1 large onion
- 6 cups cider vinegar
- 2 cups white vinegar
- 6 cups granulated sugar
- 8–10 cloves garlic (smashed)
- 1 tablespoon pickling or kosher salt
- 1/2 tablespoon turmeric powder
- 1 tablespoon whole peppercorns
- 1 teaspoon mustard seed
- 1 teaspoon celery seed
Instructions
- In a large pot, combine pickling salt, cider vinegar, white vinegar, water, sugar, garlic cloves, turmeric powder, peppercorns, mustard seed, and celery seed. Bring to boil.
- Sterilize jars in a canning pot.
- Pack sliced peppers and onions into jars; pour brine using a wide-mouth funnel.
- Wipe jar rims clean; seal with lids.
- Process in a water bath for about 15 minutes.
- Cool jars completely on the counter; let sit for at least three weeks before enjoying.
Nutrition
- Serving Size: 1 serving
- Calories: 25
- Sugar: 6g
- Sodium: 200mg
- Fat: 0g
- Saturated Fat: 0g
- Unsaturated Fat: 0g
- Trans Fat: 0g
- Carbohydrates: 7g
- Fiber: 0g
- Protein: <1g
- Cholesterol: 0mg