

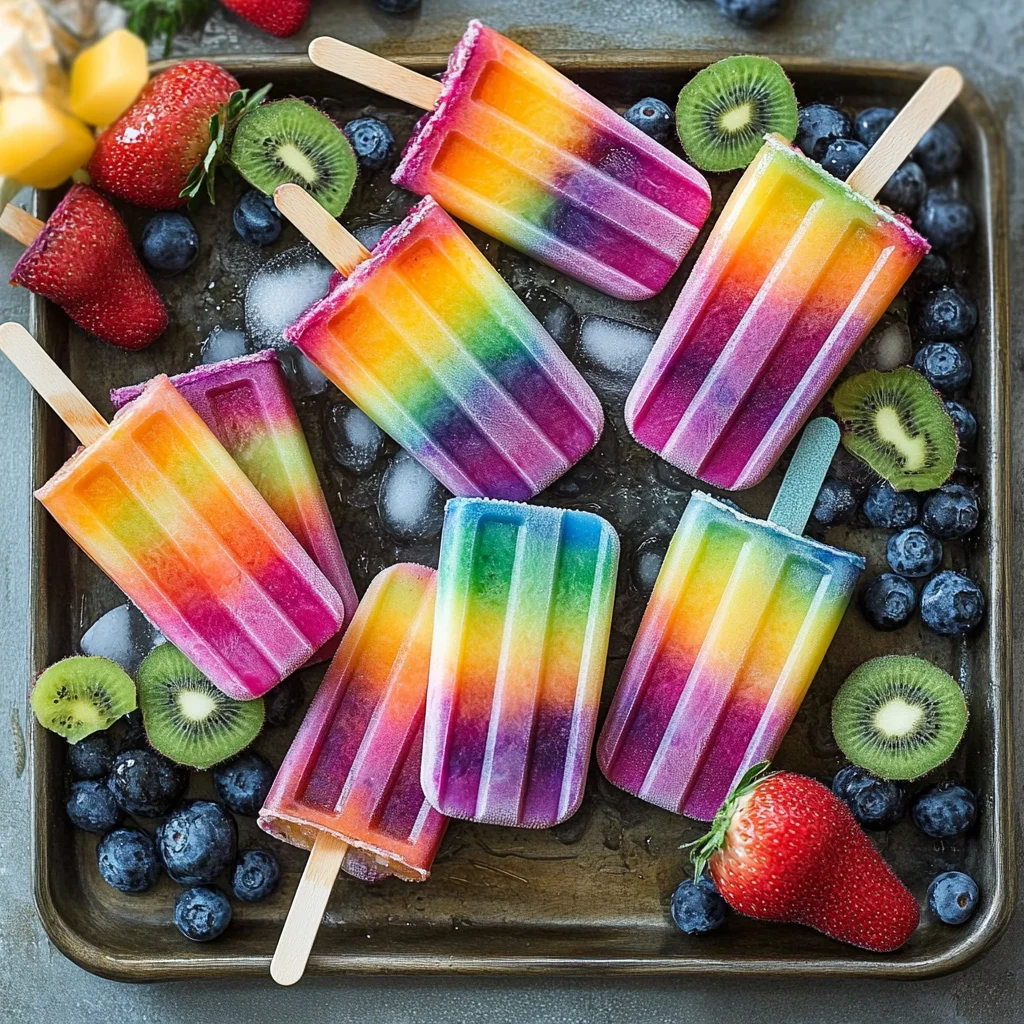
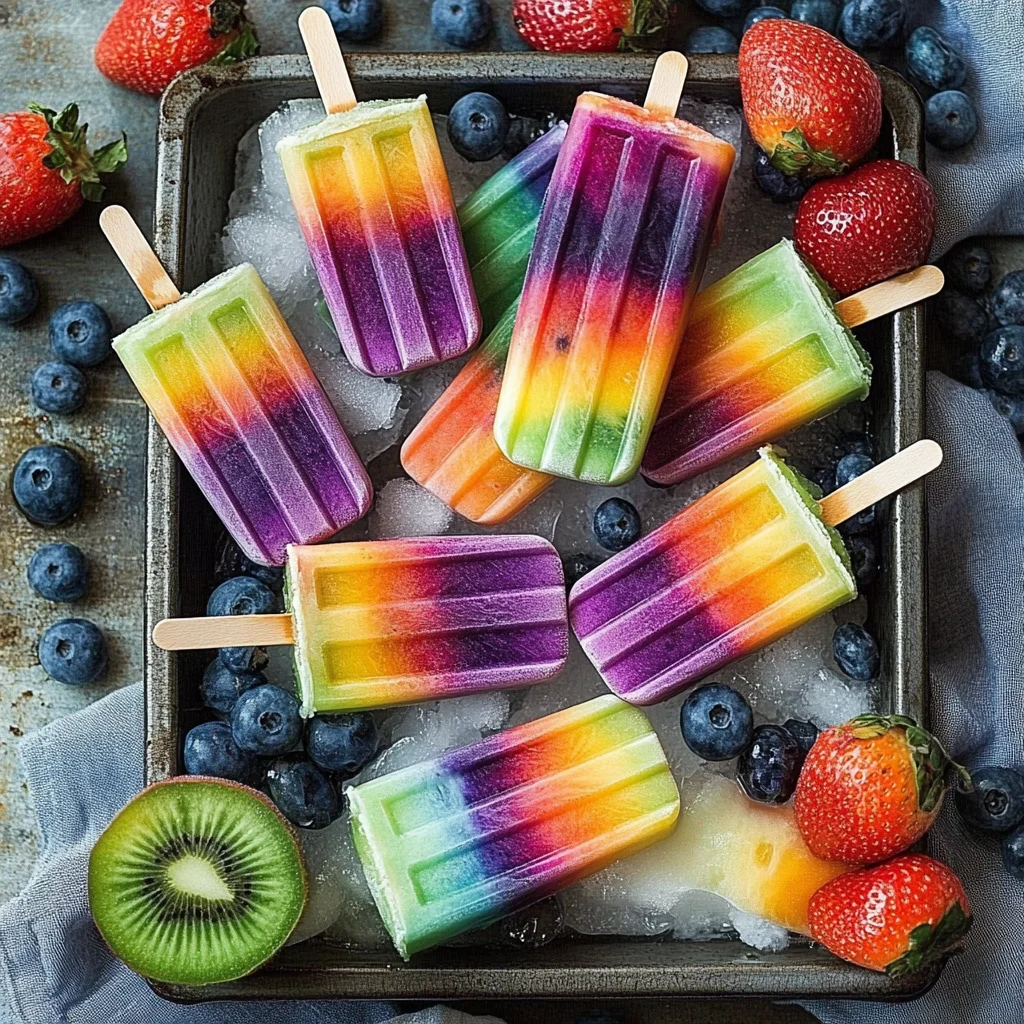
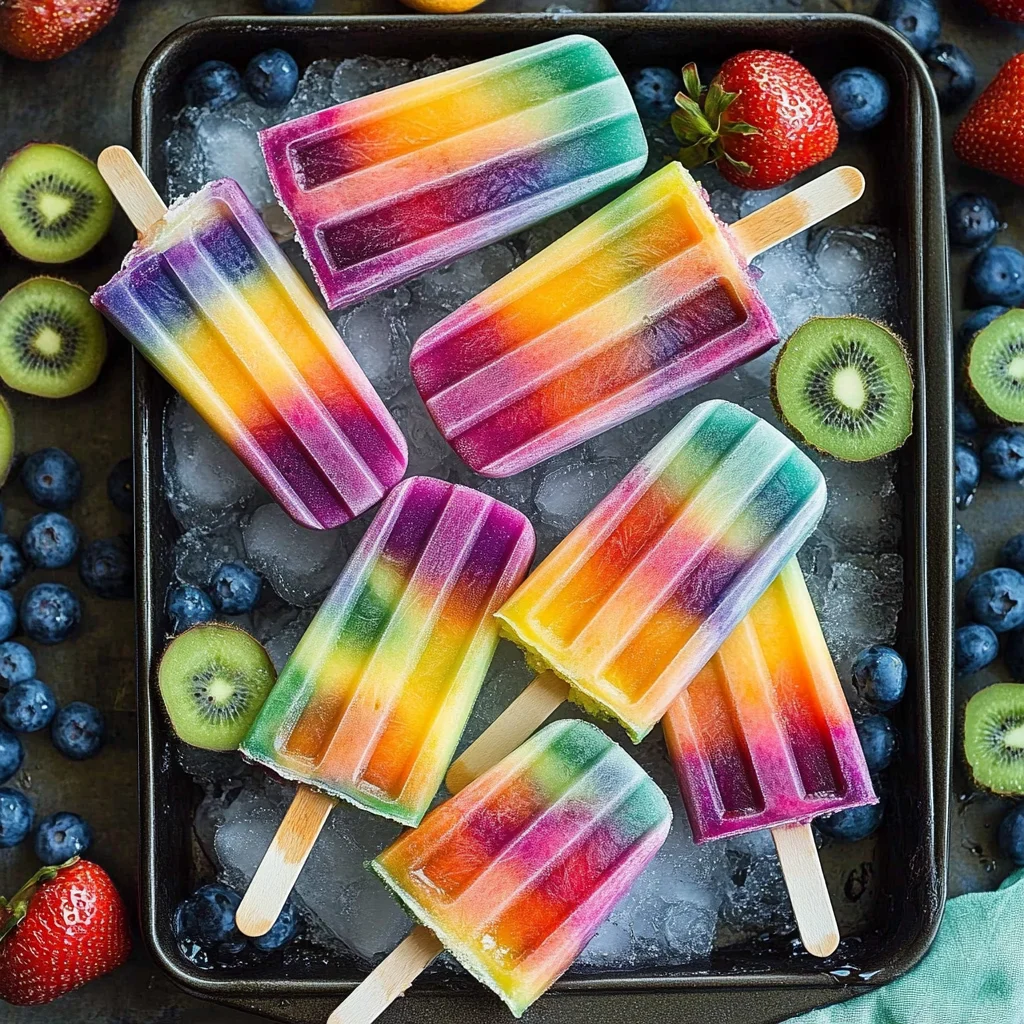
Outstanding 7 layer rainbow popsicles! Make your own homemade rainbow popsicles with lots of fresh fruit! These vibrant treats are perfect for summer gatherings, birthday parties, or just a fun afternoon snack. With layers of delicious flavors and colors, they not only look great but also provide a refreshing burst of fruity goodness that everyone will love.
Why You’ll Love This Recipe
- Colorful Appeal: These rainbow popsicles are visually stunning and will impress your guests.
- Healthy Ingredients: Packed with fresh fruit and yogurt, they’re a nutritious treat for kids and adults alike.
- Customizable Flavors: Feel free to mix and match fruits to create your perfect flavor combination.
- Easy to Make: Simple steps ensure that anyone can whip up this delightful dessert in no time.
- Perfect for Any Occasion: Whether it’s a summer barbecue or a casual get-together, these popsicles fit right in.
Tools and Preparation
To make these rainbow popsicles, you’ll need a few essential tools to ensure the process is smooth and fun.
Essential Tools and Equipment
- Popsicle molds
- Blender
- Measuring cups
- Knife
Importance of Each Tool
- Popsicle molds: These help shape your popsicles perfectly, making them easy to remove when frozen.
- Blender: A high-speed blender ensures that all ingredients blend smoothly, creating silky layers.
- Measuring cups: Accurate measurements help achieve the best balance of flavors in each layer.
Ingredients
Outstanding 7 layer rainbow popsicles! Make your own homemade rainbow popsicles with lots of fresh fruit!
Base Layer Ingredients
- 1 frozen banana
- 1/2 cup (113g) greek yogurt (vanilla or plain)
- 1/2 cup frozen raspberries
- 1/2 cup frozen strawberries
- Water or liquid for blending
Layer Two Ingredients
- 1 frozen banana
- 1/2 cup (113g) greek yogurt (vanilla or plain)
- 1/2 cup frozen peaches
- 1 small orange, peeled
- 1/4 cup frozen mango
- Water or liquid for blending
Layer Three Ingredients
- 2 frozen bananas
- 1/2 cup (113g) greek yogurt (vanilla or plain)
- 1 cup frozen pineapple
- Water or liquid for blending
Layer Four Ingredients
- 2 frozen bananas
- 1/2 cup (113g) greek yogurt (vanilla or plain)
- 1 handful (or more) spinach
- 1 cup frozen pineapple
- Water or liquid for blending
Layer Five Ingredients
- 2 frozen bananas
- 1/2 cup (113g) greek yogurt (vanilla or plain)
- 1 cup frozen pineapple
- Small amount of blue food coloring
- Water or liquid for blending
Layer Six Ingredients
- 1 frozen banana
- 1/2 cup (113g) greek yogurt (vanilla or plain)
- 1 cup frozen mixed berries
- Water or liquid for blending
Layer Seven Ingredients
- 1 frozen banana
- 1/2 cup (113g) greek yogurt (vanilla or plain)
- 1/2 cup sliced canned beets
- 1 cup frozen strawberries or raspberries
For Garnish
- 2 tablespoons fresh parsley, finely chopped
How to Make Rainbow Popsicles
Step 1: Prepare Your Molds
Before you start blending the ingredients, make sure your popsicle molds are clean and ready. Place them on a stable surface.
Step 2: Blend the First Layer
Combine the following in a blender:
– 1 frozen banana
– 1/2 cup greek yogurt
– 1/2 cup frozen raspberries
– Water as needed
Blend until smooth. Pour into the molds until they are filled about one-seventh of the way. Freeze for about 30 minutes.
Step 3: Blend the Second Layer
In the same blender, add:
– 1 frozen banana
– 1/2 cup greek yogurt
– 1/2 cup frozen peaches
– 1 small orange
Blend until creamy. Carefully pour over the first layer in molds. Freeze again for another 30 minutes.
Step 4: Repeat for Remaining Layers
Continue this process with each remaining layer, using the specified ingredients from above. Don’t forget to freeze each layer before adding the next!
Step 5: Final Freeze
Once all layers are poured into the molds, freeze completely for at least four hours or overnight.
Step 6: Serve
To serve, run warm water over the outside of the molds to loosen them. Gently pull out each rainbow popsicle and enjoy!
How to Serve Rainbow Popsicles
Rainbow popsicles are a delightful treat that can be enjoyed in various ways. They are perfect for summer gatherings, children’s parties, or as a refreshing snack on hot days. Here are some creative serving suggestions to elevate your rainbow popsicle experience.
Fun Party Platter
- Arrange an assortment of rainbow popsicles on a large platter. This colorful display will entice guests and make your party more vibrant.
Garnish with Fresh Fruits
- Add sliced fruit like strawberries, oranges, or kiwis around the popsicles. This not only enhances the presentation but also complements the fruity flavors.
Include Dipping Sauces
- Serve with yogurt or chocolate sauce for dipping. It adds an exciting twist to the traditional popsicle experience.
Create a Rainbow Dessert Bar
- Set up a DIY dessert bar where guests can choose their favorite toppings, such as granola, nuts, or shredded coconut to add to their popsicles.
Pair with Refreshing Beverages
- Offer lemonade or iced tea alongside the rainbow popsicles for a refreshing beverage option that harmonizes well with the sweet treats.
How to Perfect Rainbow Popsicles
Making the best rainbow popsicles involves attention to detail and some clever tips. Follow these suggestions to ensure your homemade treats are as delicious and visually appealing as possible.
- Choose ripe fruits: Use fresh, ripe fruits for better flavor and sweetness in your popsicles.
- Blend thoroughly: Make sure all ingredients are blended smoothly for a uniform texture without chunks.
- Layer carefully: Pour each layer slowly and let it freeze slightly before adding the next layer for a beautiful rainbow effect.
- Use silicone molds: These molds make it easier to remove the popsicles without breaking them.
- Experiment with colors: Feel free to mix different fruits and vegetables for unique flavors and vibrant colors.
- Store properly: Wrap popsicles in plastic wrap and store them in an airtight container to prevent freezer burn.
Best Side Dishes for Rainbow Popsicles
Serving rainbow popsicles is even better when paired with tasty side dishes. Complement these colorful treats with light options that enhance the overall experience. Here are some fantastic side dish ideas:
- Fruit Salad: A mix of seasonal fruits adds freshness and goes well with the sweetness of popsicles.
- Cheese Cubes: A platter of assorted cheeses provides a savory contrast to the fruity flavors of the rainbow popsicles.
- Veggie Sticks: Crunchy carrots, cucumbers, and bell peppers offer a healthy option that balances out the dessert.
- Yogurt Parfaits: Layered yogurt with granola and fresh fruit makes for a delicious side that pairs well with icy treats.
- Popcorn Bar: Provide different flavors of popcorn—sweet, salty, or savory—for guests to enjoy alongside their frozen snacks.
- Mini Sandwiches: Small sandwiches filled with cheese or deli meats create a hearty accompaniment to lighter desserts like rainbow popsicles.
Common Mistakes to Avoid
Making Rainbow Popsicles can be fun, but there are some common mistakes that can ruin your experience. Here are a few to keep in mind:
- Ignoring the layering process: A key aspect of creating beautiful rainbow popsicles is layering different fruit purees. Skip this, and you’ll end up with a muddy mix instead of distinct layers.
- Not blending ingredients properly: If your fruit or yogurt isn’t blended well, you might get chunks in your popsicles. Make sure to blend until smooth for the best texture.
- Using overly ripe fruit: While ripe fruit is sweet, it can also be too soft, affecting the popsicle’s consistency. Choose firm but ripe fruit for the best results.
- Skipping freezing time between layers: Each layer needs time to freeze before adding the next one. This helps maintain the separation of colors. Don’t rush this step!
- Overfilling molds: When pouring into molds, leave a little space at the top. Popsicles expand as they freeze, so overfilling may lead to messy spills.
Storage & Reheating Instructions
Refrigerator Storage
- Store any leftover ingredients in airtight containers.
- Use within 2-3 days for optimal freshness.
Freezing Rainbow Popsicles
- Freeze popsicles for at least 6-8 hours before consuming.
- Place them in an airtight container if storing for longer than a week.
Reheating Rainbow Popsicles
- Oven: Not recommended; these treats are best enjoyed frozen.
- Microwave: Use low heat for a few seconds if you need to soften them slightly.
- Stovetop: Also not suitable; simply allow them to thaw at room temperature for a few minutes.
Frequently Asked Questions
Here are some common questions about making Rainbow Popsicles.
Can I use fresh fruit instead of frozen?
Yes, you can use fresh fruit! However, you’ll need to add ice or adjust blending liquids to achieve the right consistency.
How long do Rainbow Popsicles last in the freezer?
Rainbow popsicles can last up to 2 months in the freezer if stored properly in an airtight container.
What other flavors can I try for my Rainbow Popsicles?
Feel free to experiment with different fruits like kiwi, blueberries, or even herbs like mint for unique flavor combinations!
Are Rainbow Popsicles healthy?
Absolutely! Made primarily from fruits and yogurt, rainbow popsicles are a nutritious treat packed with vitamins and minerals.
Final Thoughts
Rainbow popsicles are not only visually stunning but also versatile and healthy. You can easily customize them with different fruits and flavors based on your preferences. Give this recipe a try and enjoy a delightful homemade treat that’s perfect for hot summer days!
Rainbow Popsicles

Delight in the vibrant flavors of homemade rainbow popsicles, perfect for summer fun or festive gatherings. This recipe features an eye-catching seven-layer design, bursting with fresh fruit goodness to keep you cool and satisfied. Each layer showcases a different fruit puree, creating a deliciously colorful treat that is as pleasing to the eyes as it is to the palate. Easy to create and customizable, these popsicles are not only a hit among kids but also a refreshing snack for adults. Ideal for birthday parties, barbecues, or simply enjoying on a sunny afternoon, these rainbow popsicles will bring joy to any occasion.
- Prep Time: 20 minutes
- Cook Time: 0 minutes
- Total Time: 20 minutes
- Yield: Makes approximately 7 popsicles
- Category: Dessert
- Method: Freezing
- Cuisine: American
Ingredients
- Frozen bananas
- Greek yogurt (vanilla or plain)
- Frozen raspberries
- Frozen strawberries
- Frozen peaches
- Small orange (peeled)
- Frozen mango
- Frozen pineapple
- Spinach (optional for green layer)
- Blue food coloring (optional)
- Frozen mixed berries
- Sliced canned beets
- Fresh parsley (for garnish)
Instructions
- Prepare your popsicle molds by ensuring they are clean and stable.
- Blend the ingredients for each layer separately until smooth. Start with the first layer (frozen banana, Greek yogurt, frozen raspberries) and pour into molds, filling one-seventh of the way. Freeze for 30 minutes.
- Continue blending and layering each subsequent flavor mixture, freezing each layer before adding the next.
- After all layers have been added and frozen completely (about 4 hours or overnight), serve by running warm water over the molds to loosen.
Nutrition
- Serving Size: 1 serving
- Calories: 70
- Sugar: 10g
- Sodium: 30mg
- Fat: 1g
- Saturated Fat: 0g
- Unsaturated Fat: 0g
- Trans Fat: 0g
- Carbohydrates: 15g
- Fiber: 2g
- Protein: 2g
- Cholesterol: 5mg