
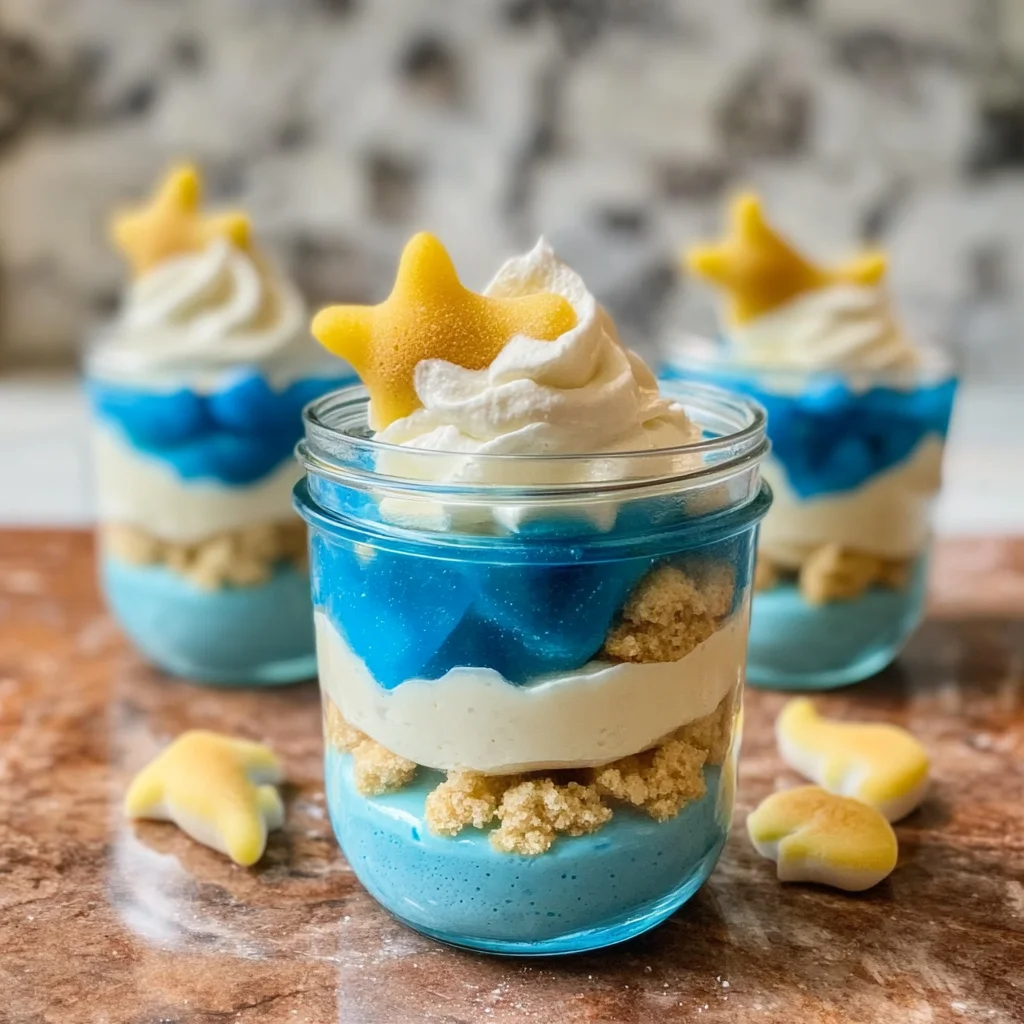
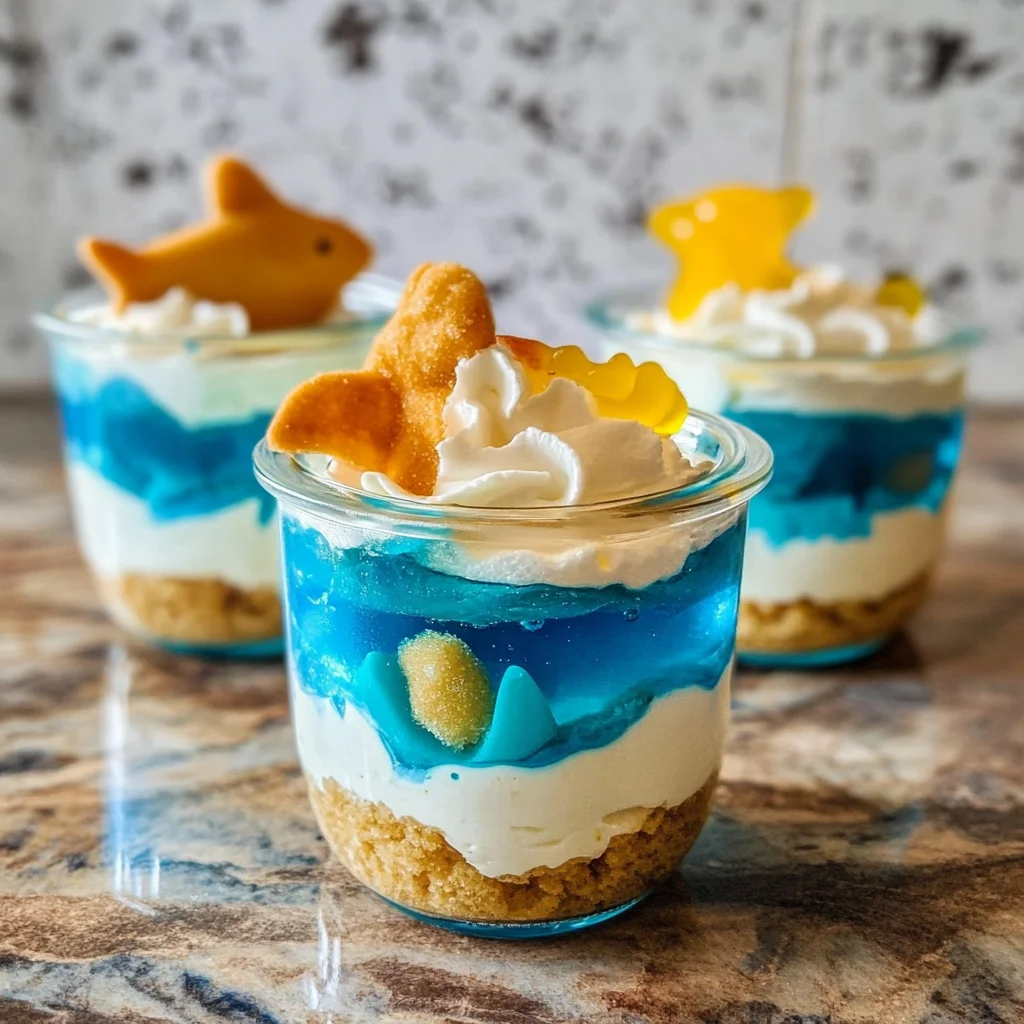
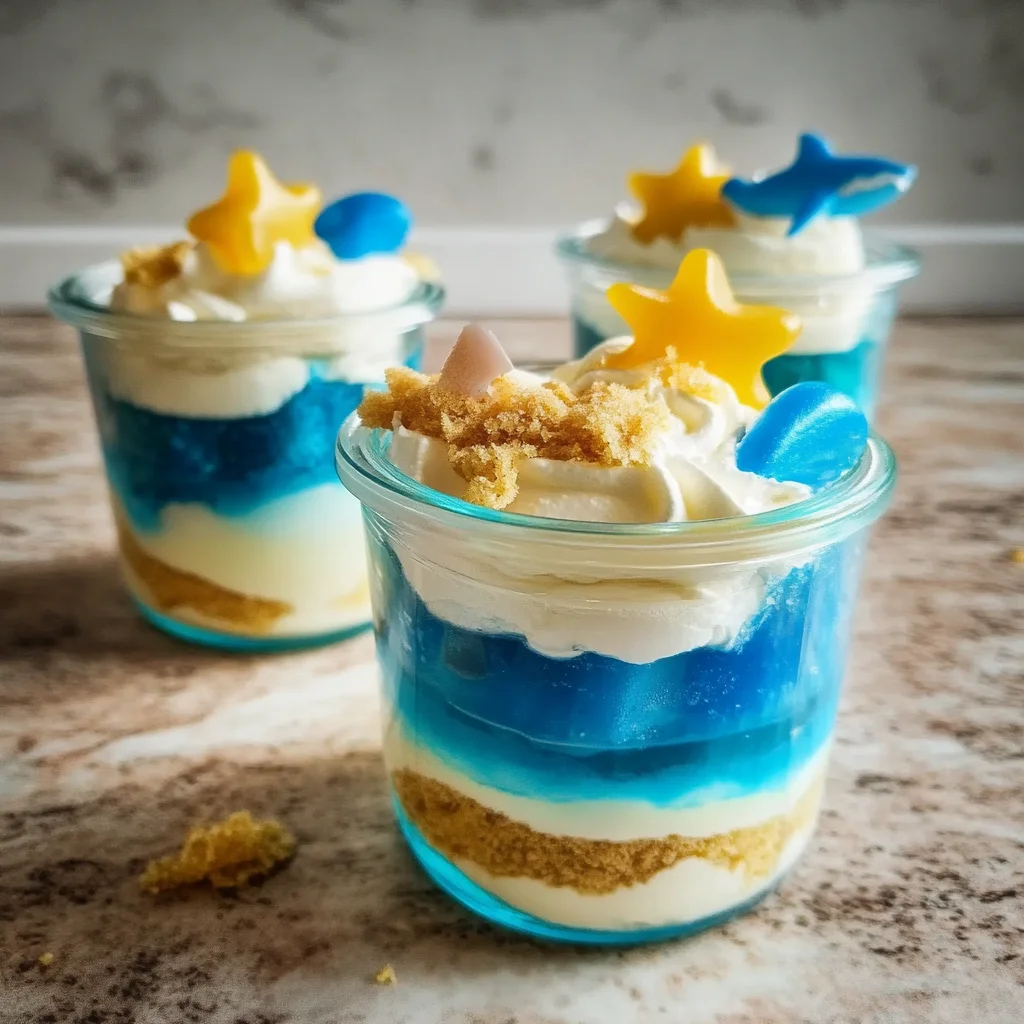
Beach Pudding Jars are the perfect beach picnic dessert! This no-bake, make-ahead, kid-friendly treat is creamy, cool, and delightfully playful. With layers of blue Jell-o, homemade whipped cream, lemon pudding, and cookie crumbs, these jars create a fun beach scene you can eat. Ideal for summer gatherings, birthday parties, or simply an afternoon snack by the shore, Beach Pudding Jars bring joy to every occasion.
Why You’ll Love This Recipe
- Easy to Make: With simple ingredients and no baking required, this recipe is perfect for both beginners and seasoned cooks.
- Fun Presentation: The layered look mimics a beach scene, making it exciting for kids and adults alike.
- Customizable: Feel free to add your favorite candies or toppings to make each jar unique.
- Make Ahead: Prep these jars in advance and enjoy more time at the beach without worrying about dessert.
- Kid-Friendly: Kids will love both making and eating these colorful treats.
Tools and Preparation
To create your Beach Pudding Jars smoothly, having the right tools makes all the difference. Gather these essentials for a fun and efficient cooking experience.
Essential Tools and Equipment
- Glass jars (20oz or 8oz)
- Hand mixer
- Mixing bowls
- Food processor or rolling pin
- Measuring cups
Importance of Each Tool
- Glass jars: Perfect for presenting your dessert attractively while keeping everything contained.
- Hand mixer: Ensures that your whipped cream achieves the right texture quickly and easily.
- Food processor: Saves time and effort when crushing cookies into fine crumbs.
Ingredients
Here’s what you’ll need to whip up these delightful Beach Pudding Jars:
For the Blue Layer
- 1 (3oz) box of Blue Jell-o
- 2 c water
- 6-12 gummy sharks
For the Creamy Layer
- 2 c lemon pudding (try my 60 Second Lemon Pudding recipe!)
- 2 c heavy whipping cream
- 1 Tbsp granulated sugar
For the Crunchy Layer
- 1 ½ c vanilla wafer cookies
- 1-2 Oreo cookie sandwiches (creme removed) or 4 chocolate wafers
For Decoration (Optional)
- Other edible beach-themed décor like molded chocolate or mini cakes
How to Make Beach Pudding Jars
Step 1: Prepare Your Jars
Set aside 2 (20oz) glass jars or 4 (8oz) glass jars with lids. This will ensure that your Beach Pudding Jars stay fresh.
Step 2: Make the Blue Jell-o Layer
- Prepare the Jell-o according to the package instructions using 2 cups of water.
- Once mixed, pour the prepared Jell-o evenly into all jars.
- Allow the Jell-o to cool until it reaches room temperature.
Step 3: Add Gummy Sharks
- Place gummy sharks at the bottom of each jar—3 for larger jars and 2 for smaller ones.
- Chill in the refrigerator for at least 3 hours until set.
Step 4: Whip the Cream
- In a large bowl, combine heavy cream and sugar.
- Use a hand mixer to beat on high speed until medium-stiff peaks form, about 2-3 minutes.
Step 5: Crush Cookies
Use a food processor or a large plastic bag with a rolling pin to crush vanilla wafer cookies into medium-fine crumbs.
Step 6: Assemble Your Jars
Layer your ingredients in each jar:
1. Start with the set blue Jell-o layer,
2. Add a layer of whipped cream,
3. Then add cookie crumbs,
4. Repeat layers as desired,
5. Top with optional edible decorations.
Enjoy your delightful Beach Pudding Jars at your next picnic or summer gathering!
How to Serve Beach Pudding Jars
Beach Pudding Jars are not only fun to make but also delightful to serve. These colorful, layered treats can be enjoyed in various ways, enhancing your beach picnic experience.
Individual Treats
- Each jar can be served as a personal dessert, making it easy for guests to grab and enjoy without sharing.
Family Style
- Arrange several jars on a picnic table for a vibrant display. This makes it easy for everyone to choose their favorite while adding a festive look.
Themed Party Favors
- Gift these jars as party favors at beach-themed events. They provide a sweet memory of the occasion that guests can take home.
Creative Garnishes
- Top each jar with edible decorations like chocolate seashells or gummy candies for an extra touch of fun and creativity.
How to Perfect Beach Pudding Jars
To ensure your Beach Pudding Jars turn out perfectly, follow these simple tips for optimal results.
- Use cold ingredients: Start with chilled heavy cream and prepared Jell-o for easier mixing and better layering.
- Layer carefully: Pour each layer slowly and gently to maintain distinct colors and prevent mixing.
- Chill between layers: Allow each layer to set before adding the next one. This ensures clear separation between the colors.
- Garnish creatively: Use mini cakes, molded chocolates, or colorful candies on top for an appealing beach scene.
- Adjust sweetness: Taste the whipped cream before adding sugar; adjust according to your preference for sweetness.
Best Side Dishes for Beach Pudding Jars
Complement your Beach Pudding Jars with these delightful side dishes that enhance your picnic spread.
- Fresh Fruit Skewers: Colorful combinations of berries, melon, and pineapple make for refreshing bites.
- Veggie Platter: Crisp vegetables like carrots, cucumbers, and bell peppers served with hummus provide a healthy crunch.
- Mini Sandwiches: Small sandwiches filled with turkey or chicken salad offer savory contrast to the sweet pudding jars.
- Chips and Salsa: A crunchy snack that pairs well with fresh salsa adds zest to your picnic menu.
- Cheese Cubes: An assortment of cheese cubes provides an easy-to-eat savory option that balances the sweetness.
- Pasta Salad: A cold pasta salad with veggies and dressing is filling and easy to prepare ahead of time.
Common Mistakes to Avoid
To ensure your Beach Pudding Jars turn out perfectly, avoid these common mistakes.
- Not cooling the Jell-o properly: Make sure the Jell-o is completely set before adding any layers. This prevents them from mixing and maintains distinct layers.
- Overmixing the whipped cream: Whipping too long can lead to butter instead of light cream. Stop when medium-stiff peaks form for the best texture.
- Skipping the chilling time: Allowing sufficient chill time is crucial. Aim for at least 3 hours to ensure stability and flavor melding.
- Using stale cookies: Fresh cookies are essential for a crunchy texture. Always check your cookies for freshness before using them in the recipe.
- Ignoring decoration options: Adding fun decorations makes your jars visually appealing. Incorporate beach-themed toppings for a playful touch.
Storage & Reheating Instructions
Refrigerator Storage
- Store in airtight containers to keep them fresh.
- Consume within 3-5 days for optimal taste and texture.
Freezing Beach Pudding Jars
- Not recommended as freezing can change the texture of the Jell-o and whipped cream.
- If you must freeze, use freezer-safe containers and consume within a month.
Reheating Beach Pudding Jars
- Oven: Not applicable; these are best served cold.
- Microwave: Use with caution; remove from jar and heat in short bursts until slightly warm if desired.
- Stovetop: Not recommended; these desserts are ideally enjoyed chilled.
Frequently Asked Questions
Have questions about making your Beach Pudding Jars? Here are some common inquiries.
How do I customize my Beach Pudding Jars?
You can personalize your jars by using different flavored puddings or adding various candies as decoration to match your theme.
Can I use different gel flavors for Beach Pudding Jars?
Absolutely! Feel free to experiment with other fruit-flavored gelatins that suit your taste preferences.
How long do Beach Pudding Jars last?
When stored in the refrigerator, they last up to 5 days, ensuring you have enough time to enjoy them!
What can I substitute for heavy whipping cream?
For a lighter version, consider using coconut cream or a plant-based whipped topping as a dairy-free alternative.
Final Thoughts
Beach Pudding Jars are not only fun and easy to make but also versatile enough for any occasion. You can customize layers and toppings to suit any gathering. Share this delightful dessert at your next picnic or beach party and watch it disappear!
Beach Pudding Jars
Dive into tasty Beach Pudding Jars! Enjoy this no-bake dessert that’s perfect for picnics—light, creamy, and fun. Try it today!
- Prep Time: 15 minutes
- Cook Time: 0 minutes
- Total Time: 15 minutes
- Yield: Serves 4
- Category: Dessert
- Method: No-bake
- Cuisine: American
Ingredients
- 1 (3oz) box of Blue Jell-o
- 2 cups water
- 2 cups lemon pudding
- 2 cups heavy whipping cream
- 1 ½ cups vanilla wafer cookies
- Gummy sharks (optional)
- Edible beach-themed decorations (optional)
Instructions
- Prepare the Blue Jell-o according to package instructions using 2 cups of water; pour into jars and let cool.
- Place gummy sharks in the cooled Jell-o layer; refrigerate until set (about 3 hours).
- In a mixing bowl, whip heavy cream with sugar until medium-stiff peaks form.
- Crush vanilla wafers into fine crumbs.
- Layer your jars with the set Jell-o, whipped cream, and cookie crumbs until filled; top with optional decorations.
Nutrition
- Serving Size: 1 jar (200g)
- Calories: 320
- Sugar: 28g
- Sodium: 150mg
- Fat: 19g
- Saturated Fat: 11g
- Unsaturated Fat: 7g
- Trans Fat: 0g
- Carbohydrates: 35g
- Fiber: 1g
- Protein: 3g
- Cholesterol: 65mg